仔细阅读本教程,你将会学习到如何解决在外贸网站建设中遇到的以下核心问题:
1 如何正确的自定义我的账户的样式
2 如何删除无用的导航菜单链接及菜单排序
3 如何自定义导航菜单图标
4 如何自定义新的导航菜单

首先,如何从导航菜单中删除不需要的菜单呢?
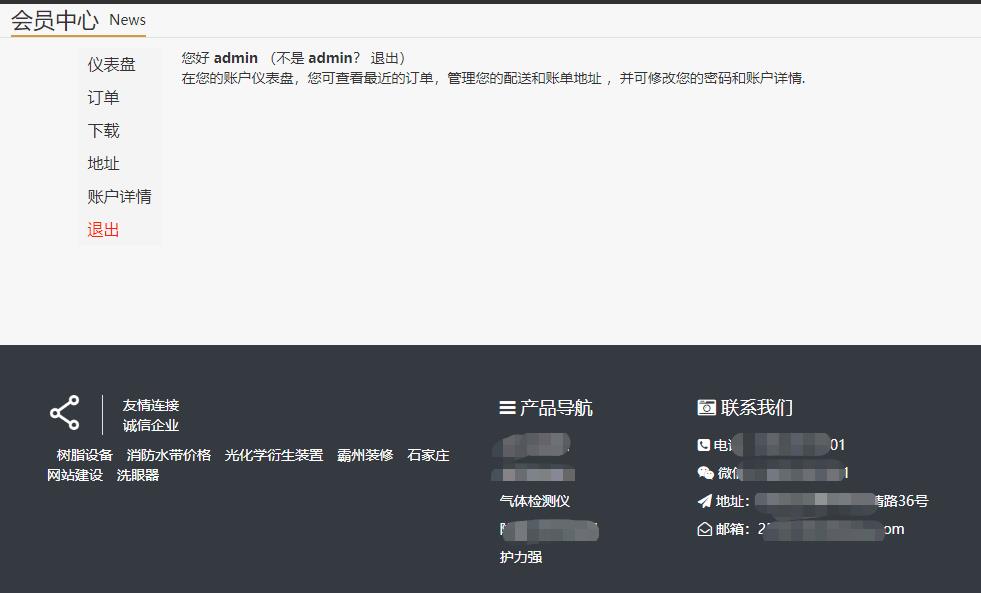
比如,我做了一个虚拟产品的woocommerce站点,不需要用户添加地址,那么就要去掉我的账户中的“地址”这个菜单,代码如下:
/**
 * @snippet       Remove My Account Menu Links
 * @author        铬元素
 * @url           https://52gys.cn/woocommerce/my-account-menu.html#remove_items
 */
add_filter( 'woocommerce_account_menu_items', 'misha_remove_my_account_links' );
function misha_remove_my_account_links( $menu_links ){

	unset( $menu_links[ 'edit-address' ] ); // Addresses

	//unset( $menu_links[ 'dashboard' ] ); // Remove Dashboard
	//unset( $menu_links[ 'payment-methods' ] ); // Remove Payment Methods
	//unset( $menu_links[ 'orders' ] ); // Remove Orders
	//unset( $menu_links[ 'downloads' ] ); // Disable Downloads
	//unset( $menu_links[ 'edit-account' ] ); // Remove Account details tab
	//unset( $menu_links[ 'customer-logout' ] ); // Remove Logout link

	return $menu_links;

}
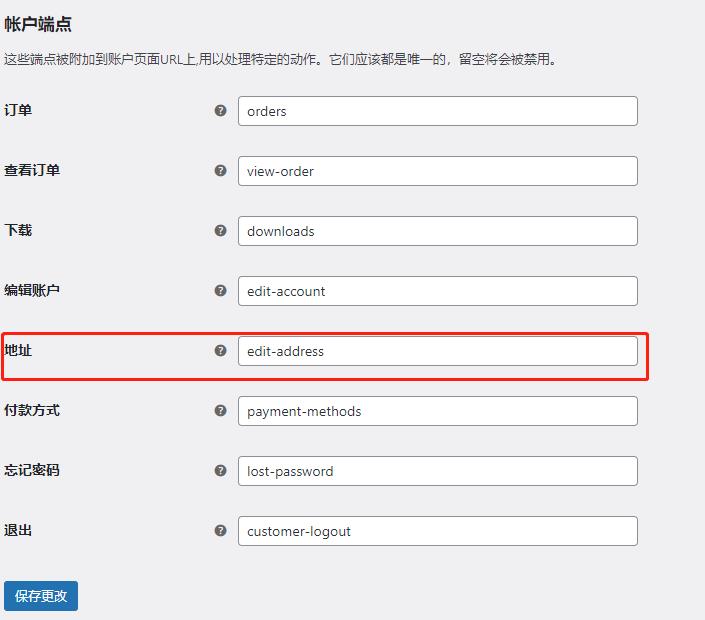
只需要将以上代码放到主题的function.php中就可以了。很简单是吧,然后通过注释也可以轻松移除掉其他的菜单。完事了?不对,这里还有个问题,删除菜单后,如果我们依然访问菜单地址的网址,还是可以打开的,这就是bug了,该怎么办呢?很简单,不需要通过代码,woocommerce很方便的把这个功能放到了后台,woocommerce-设置-高级:

我们只需要把这里填写的值删除掉就可以了,为了防止以后要恢复,还是建议咱们截图保存一下,实在忘记了也没关系,重装一下woocommerce也可以解决。
怎么定制woocommerce我的账户的样式呢?
这是个重点,开发页面时候发现,如果我们直接在页面添加短码,那么它输出以后其实是排版混乱的,那么该怎么样调整版面呢?
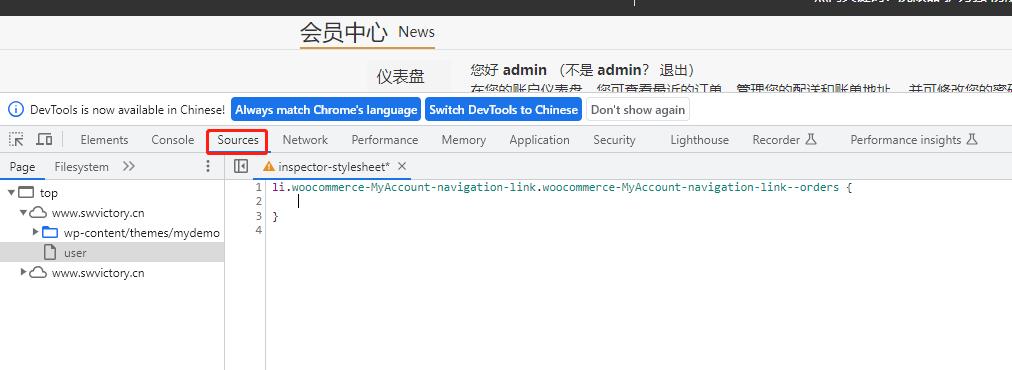
要巧妙使用浏览器开发工具:以谷歌浏览器为例,在需要调整的地方点击右键-检查:

注意看,这里需要开发者要有基本的css常识,点击我们需要调整的class类,然后点击右方加号,然后点击上方菜单:

这样就可以在编辑器对选中元素直接编辑css了,效果非常直观,等编辑完成以后,只需要把代码复制到自己的css文件中即可。
如何重命名我的账户菜单链接
可以用同样的方法完成,挂钩到woocommerce_account_menu_items过滤器,你只需要知道你想重命名的标签ID,上面都提到了。
/**
 * @snippet       Rename My Account Menu Links
 * @author        铬元素
 * @url           https://52gys.cn/woocommerce/my-account-menu.html#rename_tabs
 */
add_filter( 'woocommerce_account_menu_items', 'misha_rename_downloads' );

function misha_rename_downloads( $menu_links ){

	// $menu_links[ 'TAB ID HERE' ] = 'NEW TAB NAME HERE';
	$menu_links[ 'downloads' ] = 'My Files';

	return $menu_links;
}
可以通过这个办法重命名任何一个菜单的标题。以上代码是将下载重命名为MY Files。
如何更改导航菜单的顺序呢?
更改我的帐户菜单项的顺序只是更改数组元素的顺序。因此,如果您没有在此处删除或添加任何自定义菜单链接,您的菜单$menu_links可能如下所示:
print_r( $menu_links );
/* Array
(
    [dashboard] => Dashboard
    [orders] => Orders
    [downloads] => Downloads
    [edit-address] => Addresses
    [edit-account] => Account details
    [customer-logout] => Logout
) */
对其重新排序的最简单方法就是重新创建此数组。
/**
 * @snippet       Reorder My Account Menu Links
 * @author        铬元素
 * @url           https://52gys.cn/woocommerce/my-account-menu.html#change-order
 */
add_filter( 'woocommerce_account_menu_items', 'misha_menu_links_reorder' );

function misha_menu_links_reorder( $menu_links ){

	return array(
		'dashboard' => __( 'Dashboard', 'woocommerce' ),
		'downloads' => __( 'My Files', 'mishadomain' ),
		'orders' => __( 'Orders', 'woocommerce' ),
		//'edit-address' => __( 'Addresses', 'woocommerce' ),
		'edit-account' => __( 'Account details', 'woocommerce' ),
		'customer-logout' => __( 'Logout', 'woocommerce' )
	);

}
如何在我的帐户中添加自定义页面
到这部分就稍微复杂一些了,为了方便起见,我将只提供即用型代码,您可以将其插入到您当前的主题functions.php文件或自定义插件中。
/**
 * @snippet       Add Custom Page in My Account
 * @author        铬元素
 * @url           https://52gys.cn/woocommerce/my-account-menu.html#add-custom-tab
 */
// add menu link
add_filter ( 'woocommerce_account_menu_items', 'misha_log_history_link', 40 );
function misha_log_history_link( $menu_links ){

	$menu_links = array_slice( $menu_links, 0, 5, true )
	+ array( 'log-history' => 'Log history' )
	+ array_slice( $menu_links, 5, NULL, true );

	return $menu_links;

}
// register permalink endpoint
add_action( 'init', 'misha_add_endpoint' );
function misha_add_endpoint() {

	add_rewrite_endpoint( 'log-history', EP_PAGES );

}
// content for the new page in My Account, woocommerce_account_{ENDPOINT NAME}_endpoint
add_action( 'woocommerce_account_log-history_endpoint', 'misha_my_account_endpoint_content' );
function misha_my_account_endpoint_content() {

	// of course you can print dynamic content here, one of the most useful functions here is get_current_user_id()
	echo 'Last time you logged in: yesterday from Safari.';

}
需要注意的地方:
- 我使用
array_splice()PHP 函数来在“注销”链接之前显示我们的“日志历史记录”链接。如果我使用这样的代码$menu_links[ 'log-history' ] = 'Log history',那么我们的新链接会显示在最后。 - 其他一切都应该很清楚,但是因为我们对永久链接进行了更改,所以不要忘记刷新缓存。为此,请转到WordPress 管理中的设置 > 永久链接,然后只保存更改而不更改任何内容。
如何为导航菜单添加自定义小图标呢?
wordperss是支持FontAwesome的,这就使添加图标非常简单了:
你可以去 FontAwesome 网站,然后选择一个图标并复制它的 unicode 代码。

我们必须像这样在 CSS 中使用该代码:
.woocommerce-MyAccount-navigation ul li.woocommerce-MyAccount-navigation-link--log-history a:before{
	content: "\f21b"
}
然后还记得上边我们如何编辑woocommerce的样式来吗?没错,就是使用了同样的方法,通过以上代码添加图标。
如何添加带有外部 URL 的菜单链接
嗯。。确实比较复杂,但遵循官方挂钩确实可以节省了我们开发会员中心的时间。
需要2个步骤:
- 像导航菜单添加新元素
- 挂钩URL
<?php
// add link to the menu
add_filter ( 'woocommerce_account_menu_items', 'misha_one_more_link' );
function misha_one_more_link( $menu_links ){

	// we will hook "anyuniquetext123" later
	$new = array( 'anyuniquetext123' => 'Gift for you' );

	// or in case you need 2 links
	// $new = array( 'link1' => 'Link 1', 'link2' => 'Link 2' );

	// array_slice() is good when you want to add an element between the other ones
	$menu_links = array_slice( $menu_links, 0, 1, true )
	+ $new
	+ array_slice( $menu_links, 1, NULL, true );

	return $menu_links;

}

// hook the external URL
add_filter( 'woocommerce_get_endpoint_url', 'misha_hook_endpoint', 10, 4 );
function misha_hook_endpoint( $url, $endpoint, $value, $permalink ){

	if( 'anyuniquetext123' === $endpoint ) {

		// ok, here is the place for your custom URL, it could be external
		$url = 'https://example.com';

	}
	return $url;

}

// custom icon
add_action( 'wp_head', 'misha_link_custom_icon' );
function misha_link_custom_icon() {
	?><style>
	.woocommerce-MyAccount-navigation ul li.woocommerce-MyAccount-navigation-link--anyuniquetext123 a:before{
		content: "\f1fd"
	}
	</style><?php

}
以上代码有拼接,所以稍显复杂,但是逻辑其实不难。
最后,我的帐户菜单挂钩
<?php
	add_action( 'woocommerce_before_account_navigation', 'misha_some_content_before' );
	function misha_some_content_before(){
		echo 'blah blah blah before';
	}

	add_action( 'woocommerce_after_account_navigation', 'misha_some_content_after' );
	function misha_some_content_after(){
		?>
			<p>blah blah blah after</p>
		<?php
	}
使用以上代码可以给导航菜单添加任何额外的html或者文本内容,不过它们往往有wordpress的通病:都自带了css元素,需要额外的排版css。
本教程为铬元素工作室花费精力研究,查资料,转载请注明出处,如对woocommerce开发感兴趣或者想建立自己的外贸独立站,也欢迎收藏本站。


评论0